I like to have many things on the go at one time. (Actually it just provides a cover explanation hiding my ADD). Well, no matter, the Porsches are underway and I wanted a bit of change from just working in the graphics cycle, The Spice is built, but needs construction, I don't feel like that either, so I just jumped in to a new model, a Nissan 90CK. Interesting car, especially if you look at the areo charactoristics around the nose and side pod intakes, very similar to todays LMP cars.
First thing I do is serach out all the pictures I can find on the web, sometimes you can find a 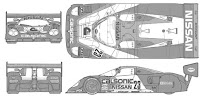 blueprint, somethimes you have to make it up from pictures. In this case I found the decal instructions from a Tamyia model of an 89C Nissan. There isn't much external change, most of the changes were suspension and engine, and the back end. So I can use the plans from the 89C and just eyeball the changes for the 90CK from photographs. What I do then is with Fireworks create a template of 1200 by 1200 to be used as a background for each view in AC3D. It is basic process of lasso, delete the background, create a top, right, left, front and back image. Sometimes you have to
 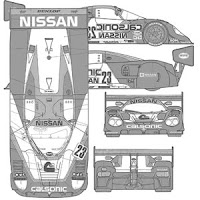 watch and scale the images, espically it seems the front and back. I just use the top and guides then porportionally scale the offending images. With photos it is crude, a lot of eyeballing and guesswork. I have tried creating lines, my own blueprint. Too much work. I have seen the creation of a 3d box where you map the approriate image on the sides and use it as a guide. It looks interesting, but I haven't figured out the logistics yet. I think it is a 3D Studio technique.
  Once this is done I export a .pgn for each of the views that I want. These are mapped as backgrounds to the approriate views within AC3D. It can be saved as a set-up with the model. At that point you align the images, zoom in and out and make sure they match. I do this by just building a small area, which may be deleted after to make sure it all matchs up.
 Aligning is important, but they never seem to match anyway. I just decide which one is best and use it as the master and fiddle with the rest. Usually it a side view beacuase I end up using that the most. You just then start. I have leared that it is the most satisfing to start
 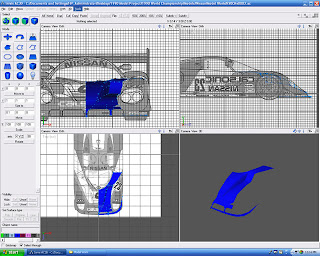 with the side first. You get a lot done in a short period of time and you can visualize the end product. Great. But, it gets in the way when you work your way through the rest. I now start in the center and work outwards, usually at the front because it has the most fiddly bits. You can see the beginning of the Nissan in the last image. There is not a lot to see yet but it does illustrate the concept of starting from centre to front. Really it the fiddly bits in the centre that is the key rather than front. Its just that usually, in these cars, the front has the fiddly bits.
 blueprint, somethimes you have to make it up from pictures. In this case I found the decal instructions from a Tamyia model of an 89C Nissan. There isn't much external change, most of the changes were suspension and engine, and the back end. So I can use the plans from the 89C and just eyeball the changes for the 90CK from photographs. What I do then is with Fireworks create a template of 1200 by 1200 to be used as a background for each view in AC3D. It is basic process of lasso, delete the background, create a top, right, left, front and back image. Sometimes you have to
  watch and scale the images, espically it seems the front and back. I just use the top and guides then porportionally scale the offending images. With photos it is crude, a lot of eyeballing and guesswork. I have tried creating lines, my own blueprint. Too much work. I have seen the creation of a 3d box where you map the approriate image on the sides and use it as a guide. It looks interesting, but I haven't figured out the logistics yet. I think it is a 3D Studio technique.
  Once this is done I export a .pgn for each of the views that I want. These are mapped as backgrounds to the approriate views within AC3D. It can be saved as a set-up with the model. At that point you align the images, zoom in and out and make sure they match. I do this by just building a small area, which may be deleted after to make sure it all matchs up.
 Aligning is important, but they never seem to match anyway. I just decide which one is best and use it as the master and fiddle with the rest. Usually it a side view beacuase I end up using that the most. You just then start. I have leared that it is the most satisfing to start
  with the side first. You get a lot done in a short period of time and you can visualize the end product. Great. But, it gets in the way when you work your way through the rest. I now start in the center and work outwards, usually at the front because it has the most fiddly bits. You can see the beginning of the Nissan in the last image. There is not a lot to see yet but it does illustrate the concept of starting from centre to front. Really it the fiddly bits in the centre that is the key rather than front. Its just that usually, in these cars, the front has the fiddly bits.
No comments:
Post a Comment